Making progress! Electrical system test, headliner
We are continuing to make progress, despite losing a lot of boat-work-time over the holidays. We had a couple of psychologically important days this past week. One day we put up the new headliner in the salon! It was a job we'd been dreading: would we be able to stretch the material as neatly as the original had been? Would the stuff we bought look decent and did I order enough? Turns out it wasn't so very hard to do, and it looks GREAT. Although it was a very small project in the scope of things, it really makes the boat look as though we've come a long way. No more raw fiberglass and plywood overhead! She looks more and more like a "real" boat... We put a couple of sealer coats of varnish on the trim pieces and replaced those (or those that we can find: still missing one long piece and a couple of small ones!) and the effect is just wonderful. For the full effect, take a look at the before and after shots:

BEFORE
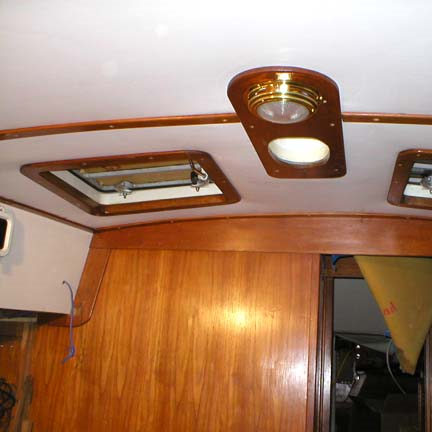
AFTER
Another banner day was when we brought a 12v battery up the ladder and hooked up the electrical system for the first time. Now, you have to understand that I had absolutely NO experience as an electrician when I started. I studied and studied and did everything by the book, but still, I was nervous when we hooked up that battery, turned the battery switch to "on", turned the house breaker to "on", and flipped the starboard interior lighting circuit breaker...........Ta Daaaaaa! Lights! Not shop lights plugged into extension cords, but the boat's own lights! Triumph!!!!!
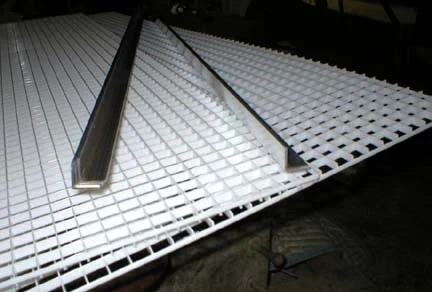
We continued to cross items off the list of "projects to finish before starting another big one" and soon Neil felt ready to begin to tackle the refrigeration project. We unpacked the new custom-bent evaporator (which we had already sent away to be charged with refrigerant) and found, to our dismay, that it did not fit into the freezer compartment of the box liner. We weighed the expense and trouble of either building a new box liner (and losing refrigerator volume to accommodate the bigger freezer needed to fit the evaporator) or trying to rebend the evaporator and possibly -probably, I thought- ruining it and having to have a new one made and charged up. We decided to try rebending it. Neil found a heavy pipe of the correct radius, we wrapped it in foam, carefully unbent the panel, and rebent it gently around the pipe. It was nerve-wracking, to be sure, but it worked!! Here is a picture of the box liner Neil made last spring:
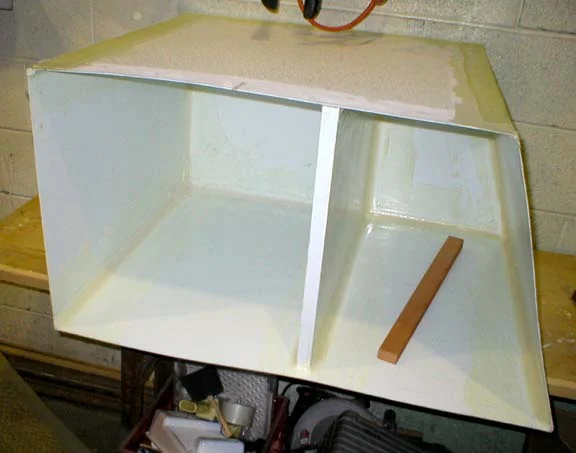
We then spent some time discussing how to put it all together. We needed to mount the evaporator panel and make cleats and supports for the shelving, while maintaining a very smooth outside to the box so as not to damage the vacuum panel insulation when it is all assembled. We also had to figure out how to make the shelving in the refrigerator. We spent some time at the hardware store and are pretty pleased with what we came up with. The evaporator panel will be mounted with 1" nylon spacers and through-bolts which will be faired over on the back. The shelving will rest on aluminum "L" (angle-iron?) riveted to the sides. We've designed the refrigerator so that each level is divided in half: the back half is a fixed (though removable for cleaning) shelf, and along the front are plastic perforated baskets which slide back and forth out of the way so that you don't need to remove them to access the next level down. We're thinking of using plastic "egg crate" material (meant for fluorescent lighting fixtures) for the shelving. Now, this all looks great on paper but we are going to build a mock-up of the shelving and the actual countertop and lid openings so that we can make sure it will work in real life before we build it! Here are some of the materials for the refrigerator: